Elasticsearch integration (PREMIUM SELF)
Moved to GitLab Premium in 13.9.
This document describes how to enable Advanced Search. After Advanced Search is enabled, you'll have the benefit of fast search response times and the advantage of the special searches.
Version requirements
| GitLab version | Elasticsearch version |
|---|---|
| GitLab Enterprise Edition 13.9 or greater | Elasticsearch 6.8 through 7.x |
| GitLab Enterprise Edition 13.3 through 13.8 | Elasticsearch 6.4 through 7.x |
| GitLab Enterprise Edition 12.7 through 13.2 | Elasticsearch 6.x through 7.x |
| GitLab Enterprise Edition 11.5 through 12.6 | Elasticsearch 5.6 through 6.x |
| GitLab Enterprise Edition 9.0 through 11.4 | Elasticsearch 5.1 through 5.5 |
| GitLab Enterprise Edition 8.4 through 8.17 | Elasticsearch 2.4 with Delete By Query Plugin installed |
System requirements
Elasticsearch requires additional resources in excess of those documented in the GitLab system requirements.
The amount of resources (memory, CPU, storage) varies greatly, based on the amount of data being indexed into the Elasticsearch cluster. According to Elasticsearch official guidelines, each node should have:
- Memory: 8 GiB (minimum).
- CPU: Modern processor with multiple cores.
- Storage: Use SSD storage. The total storage size of all Elasticsearch nodes is about 50% of the total size of your Git repositories. It includes one primary and one replica.
A few notes on CPU and storage:
-
CPU requirements for Elasticsearch tend to be minimal. There are specific scenarios where this isn't true, but GitLab.com isn't using Elasticsearch in an exceptionally CPU-heavy way. More cores are more performant than faster CPUs. Extra concurrency from multiple cores far outweighs a slightly faster clock speed in Elasticsearch.
-
Storage requirements for Elasticsearch are important, especially for indexing-heavy clusters. When possible use SSDs, whose speed is far superior to any spinning media for Elasticsearch. In testing, nodes that use SSD storage see boosts in both query and indexing performance.
-
We've introduced the
estimate_cluster_sizeRake task to estimate the Advanced Search storage requirements in advance, which -
The
estimate_cluster_sizeRake task estimates the Advanced Search storage requirements in advance. The Rake task uses total repository size for the calculation. Introduced in GitLab 13.10.
Keep in mind, these are minimum requirements for Elasticsearch. Heavily-used Elasticsearch clusters likely require considerably more resources.
Installing Elasticsearch
Elasticsearch is not included in the Omnibus packages or when you install from source. You must install it separately. Be sure to select your version. Providing detailed information on installing Elasticsearch is out of the scope of this document.
Elasticsearch should be installed on a separate server, whether you install it yourself or use a cloud hosted offering like Elastic's Elasticsearch Service (available on AWS, GCP, or Azure) or the Amazon Elasticsearch service. Running Elasticsearch on the same server as GitLab is not recommended and can cause a degradation in GitLab instance performance.
For a single node Elasticsearch cluster the functional cluster health status is yellow (will never be green) because the primary shard is allocated but replicas can not be as there is no other node to which Elasticsearch can assign a replica.
After the data is added to the database or repository and Elasticsearch is enabled in the Admin Area the search index is updated automatically.
Upgrading to a new Elasticsearch major version
Since Elasticsearch can read and use indices created in the previous major version, you don't need to change anything in the GitLab configuration when upgrading Elasticsearch.
The only thing worth noting is that if you have created your current index before GitLab 13.0, you might want to reindex from scratch (which implicitly creates an alias) in order to use some features, for example Zero downtime reindexing. Once you do that, you are able to perform zero-downtime reindexing and will benefit from any future features that make use of the alias.
If you are unsure when your current index was created,
you can check whether it was created after GitLab 13.0 by using the
Elasticsearch cat aliases API.
If the list of aliases returned contains an entry for gitlab-production that points to an index
named gitlab-production-<numerical timestamp>, your index was created after GitLab 13.0.
If the gitlab-production alias is missing, you need to reindex from scratch to use
features such as Zero-downtime reindexing.
Elasticsearch repository indexer
For indexing Git repository data, GitLab uses an indexer written in Go.
The way you install the Go indexer depends on your version of GitLab:
- For Omnibus GitLab 11.8 or greater, see Omnibus GitLab.
- For installations from source or older versions of Omnibus GitLab, install the indexer from source.
- If you are using GitLab Development Kit, see GDK Elasticsearch how-to
Omnibus GitLab
Starting with GitLab 11.8, the Go indexer is included in Omnibus GitLab. The former Ruby-based indexer was removed in GitLab 12.3.
From source
First, we need to install some dependencies, then we build and install the indexer itself.
This project relies on International Components for Unicode (ICU) for text encoding,
therefore we need to ensure the development packages for your platform are
installed before running make.
Debian / Ubuntu
To install on Debian or Ubuntu, run:
sudo apt install libicu-devCentOS / RHEL
To install on CentOS or RHEL, run:
sudo yum install libicu-develmacOS
To install on macOS, run:
brew install icu4c
export PKG_CONFIG_PATH="/usr/local/opt/icu4c/lib/pkgconfig:$PKG_CONFIG_PATH"
Building and installing
To build and install the indexer, run:
indexer_path=/home/git/gitlab-elasticsearch-indexer

# Run the installation task for gitlab-elasticsearch-indexer:
sudo -u git -H bundle exec rake gitlab:indexer:install[$indexer_path] RAILS_ENV=production
cd $indexer_path && sudo make install
The gitlab-elasticsearch-indexer will be installed to /usr/local/bin.
You can change the installation path with the PREFIX environment variable.
Please remember to pass the -E flag to sudo if you do so.
Example:
PREFIX=/usr sudo -E make installAfter installation, be sure to enable Elasticsearch.
NOTE:
If you see an error such as Permission denied - /home/git/gitlab-elasticsearch-indexer/ while indexing, you
may need to set the production -> elasticsearch -> indexer_path setting in your gitlab.yml file to
/usr/local/bin/gitlab-elasticsearch-indexer, which is where the binary is installed.
Enabling Advanced Search
For GitLab instances with more than 50GB repository data you can follow the instructions for Indexing large instances below.
To enable Advanced Search, you need to have admin access to GitLab:
-
Navigate to Admin Area, then Settings > Advanced Search.
NOTE: To see the Advanced Search section, you need an active GitLab Premium license.
-
Configure the Advanced Search settings for your Elasticsearch cluster. Do not enable Search with Elasticsearch enabled yet.
-
Now enable Elasticsearch indexing in Admin Area > Settings > Advanced Search and click Save changes. This will create an empty index if one does not already exist.
-
Click Index all projects.
-
Click Check progress in the confirmation message to see the status of the background jobs.
-
Personal snippets need to be indexed using another Rake task:
# Omnibus installations sudo gitlab-rake gitlab:elastic:index_snippets # Installations from source bundle exec rake gitlab:elastic:index_snippets RAILS_ENV=production -
After the indexing has completed, enable Search with Elasticsearch enabled in Admin Area > Settings > Advanced Search and click Save changes.
NOTE: When your Elasticsearch cluster is down while Elasticsearch is enabled, you might have problems updating documents such as issues because your instance queues a job to index the change, but cannot find a valid Elasticsearch cluster.
Advanced Search configuration
The following Elasticsearch settings are available:
| Parameter | Description |
|---|---|
Elasticsearch indexing |
Enables or disables Elasticsearch indexing and creates an empty index if one does not already exist. You may want to enable indexing but disable search in order to give the index time to be fully completed, for example. Also, keep in mind that this option doesn't have any impact on existing data, this only enables/disables the background indexer which tracks data changes and ensures new data is indexed. |
Pause Elasticsearch indexing |
Enables or disables temporary indexing pause. This is useful for cluster migration/reindexing. All changes are still tracked, but they are not committed to the Elasticsearch index until resumed. |
Search with Elasticsearch enabled |
Enables or disables using Elasticsearch in search. |
URL |
The URL of your Elasticsearch instance. Use a comma-separated list to support clustering (for example, http://host1, https://host2:9200). If your Elasticsearch instance is password-protected, use the Username and Password fields described below. Alternatively, use inline credentials such as http://<username>:<password>@<elastic_host>:9200/. |
Username |
The username of your Elasticsearch instance. |
Password |
The password of your Elasticsearch instance. |
Number of Elasticsearch shards |
Elasticsearch indexes are split into multiple shards for performance reasons. In general, you should use at least 5 shards, and indexes with tens of millions of documents need to have more shards (see below). Changes to this value do not take effect until the index is recreated. You can read more about tradeoffs in the Elasticsearch documentation. |
Number of Elasticsearch replicas |
Each Elasticsearch shard can have a number of replicas. These are a complete copy of the shard, and can provide increased query performance or resilience against hardware failure. Increasing this value will greatly increase total disk space required by the index. |
Limit namespaces and projects that can be indexed |
Enabling this will allow you to select namespaces and projects to index. All other namespaces and projects will use database search instead. Please note that if you enable this option but do not select any namespaces or projects, none will be indexed. Read more below. |
Using AWS hosted Elasticsearch with IAM credentials |
Sign your Elasticsearch requests using AWS IAM authorization, AWS EC2 Instance Profile Credentials, or AWS ECS Tasks Credentials. Please refer to Identity and Access Management in Amazon Elasticsearch Service for details of AWS hosted Elasticsearch domain access policy configuration. |
AWS Region |
The AWS region in which your Elasticsearch service is located. |
AWS Access Key |
The AWS access key. |
AWS Secret Access Key |
The AWS secret access key. |
Maximum file size indexed |
See the explanation in instance limits.. |
Maximum field length |
See the explanation in instance limits.. |
Maximum bulk request size (MiB) |
The Maximum Bulk Request size is used by the GitLab Golang-based indexer processes and indicates how much data it ought to collect (and store in memory) in a given indexing process before submitting the payload to Elasticsearch's Bulk API. This setting should be used with the Bulk request concurrency setting (see below) and needs to accommodate the resource constraints of both the Elasticsearch host(s) and the host(s) running the GitLab Golang-based indexer either from the gitlab-rake command or the Sidekiq tasks. |
Bulk request concurrency |
The Bulk request concurrency indicates how many of the GitLab Golang-based indexer processes (or threads) can run in parallel to collect data to subsequently submit to Elasticsearch's Bulk API. This increases indexing performance, but fills the Elasticsearch bulk requests queue faster. This setting should be used together with the Maximum bulk request size setting (see above) and needs to accommodate the resource constraints of both the Elasticsearch host(s) and the host(s) running the GitLab Golang-based indexer either from the gitlab-rake command or the Sidekiq tasks. |
Client request timeout |
Elasticsearch HTTP client request timeout value in seconds. 0 means using the system default timeout value, which depends on the libraries that GitLab application is built upon. |
WARNING:
Increasing the values of Maximum bulk request size (MiB) and Bulk request concurrency can negatively impact
Sidekiq performance. Return them to their default values if you see increased scheduling_latency_s durations
in your Sidekiq logs. For more information, see
issue 322147.
Limiting namespaces and projects
If you select Limit namespaces and projects that can be indexed, more options will become available.
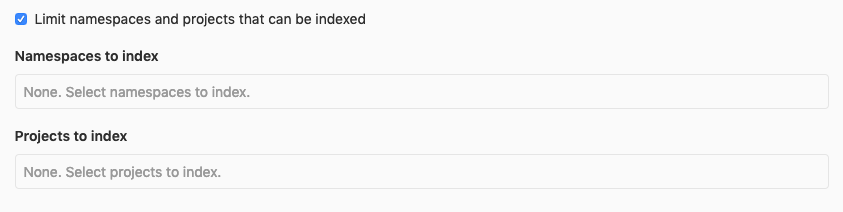
You can select namespaces and projects to index exclusively. Note that if the namespace is a group it will include any subgroups and projects belonging to those subgroups to be indexed as well.
Advanced Search only provides cross-group code/commit search (global) if all name-spaces are indexed. In this particular scenario where only a subset of namespaces are indexed, a global search will not provide a code or commit scope. This will be possible only in the scope of an indexed namespace. Currently there is no way to code/commit search in multiple indexed namespaces (when only a subset of namespaces has been indexed). For example if two groups are indexed, there is no way to run a single code search on both. You can only run a code search on the first group and then on the second.
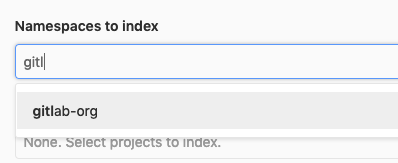
You can filter the selection dropdown by writing part of the namespace or project name you're interested in.
NOTE: If no namespaces or projects are selected, no Advanced Search indexing will take place.
WARNING:
If you have already indexed your instance, you will have to regenerate the index in order to delete all existing data
for filtering to work correctly. To do this run the Rake tasks gitlab:elastic:recreate_index and
gitlab:elastic:clear_index_status. Afterwards, removing a namespace or a project from the list will delete the data
from the Elasticsearch index as expected.
Enabling custom language analyzers
You can improve the language support for Chinese and Japanese languages by utilizing smartcn and/or kuromoji analysis plugins from Elastic.
To enable language(s) support:
- Install the desired plugin(s), please refer to Elasticsearch documentation for plugins installation instructions. The plugin(s) must be installed on every node in the cluster, and each node must be restarted after installation. For a list of plugins, see the table later in this section.
- Navigate to the Admin Area, then Settings > Advanced Search..
- Locate Custom analyzers: language support.
- Enable plugin(s) support for Indexing.
- Click Save changes for the changes to take effect.
- Trigger Zero downtime reindexing or reindex everything from scratch to create a new index with updated mappings.
- Enable plugin(s) support for Searching after the previous step is completed.
For guidance on what to install, see the following Elasticsearch language plugin options:
| Parameter | Description |
|---|---|
Enable Chinese (smartcn) custom analyzer: Indexing |
Enables or disables Chinese language support using smartcn custom analyzer for newly created indices. |
Enable Chinese (smartcn) custom analyzer: Search |
Enables or disables using smartcn fields for Advanced Search. Please only enable this after installing the plugin, enabling custom analyzer indexing and recreating the index. |
Enable Japanese (kuromoji) custom analyzer: Indexing |
Enables or disables Japanese language support using kuromoji custom analyzer for newly created indices. |
Enable Japanese (kuromoji) custom analyzer: Search |
Enables or disables using kuromoji fields for Advanced Search. Please only enable this after installing the plugin, enabling custom analyzer indexing and recreating the index. |
Disabling Advanced Search
To disable the Elasticsearch integration:
-
Navigate to the Admin Area, then Settings > Advanced Search.
-
Uncheck Elasticsearch indexing and Search with Elasticsearch enabled.
-
Click Save changes for the changes to take effect.
-
(Optional) Delete the existing indexes:
# Omnibus installations
sudo gitlab-rake gitlab:elastic:delete_index

# Installations from source
bundle exec rake gitlab:elastic:delete_index RAILS_ENV=production
Zero downtime reindexing
The idea behind this reindexing method is to leverage the Elasticsearch reindex API
and Elasticsearch index alias feature to perform the operation. We set up an index alias which connects to a
primary index which is used by GitLab for reads/writes. When reindexing process starts, we temporarily pause
the writes to the primary index. Then, we create another index and invoke the Reindex API which migrates the
index data onto the new index. Once the reindexing job is complete, we switch to the new index by connecting the
index alias to it which becomes the new primary index. At the end, we resume the writes and normal operation resumes.
Trigger the reindex via the Advanced Search administration
- Introduced in GitLab 13.2.
- A scheduled index deletion and the ability to cancel it was introduced in GitLab 13.3.
- Support for retries during reindexing was introduced in GitLab 13.12.
To trigger the reindexing process:
- Sign in to your GitLab instance as an administrator.
- Go to Admin Area > Settings > Advanced Search > Elasticsearch zero-downtime reindexing.
- Select Trigger cluster reindexing.
Reindexing can be a lengthy process depending on the size of your Elasticsearch cluster.
After this process is completed, the original index is scheduled to be deleted after 14 days. You can cancel this action by pressing the Cancel button on the same page you triggered the reindexing process.
While the reindexing is running, you will be able to follow its progress under that same section.
Elasticsearch zero-downtime reindexing
Introduced in GitLab 13.12.
The following reindex settings are available in Admin Area > Settings > Advanced Search > Elasticsearch zero-downtime reindexing:
Slice multiplier
The slice multiplier calculates the number of slices during reindexing.
GitLab uses manual slicing to control the reindex efficiently and safely, which enables users to retry only failed slices.
The multiplier defaults to 2 and applies to the number of shards per index.
For example, if this value is 2 and your index has 20 shards, then the
reindex task is split into 40 slices.
Maximum running slices
The maximum running slices parameter defaults to 60 and corresponds to the
maximum number of slices allowed to run concurrently during Elasticsearch
reindexing.
Setting this value too high can have adverse performance impacts as your cluster may become heavily saturated with searches and writes. Setting this value too low may lead the reindexing process to take a very long time to complete.
The best value for this will depend on your cluster size, whether you're willing to accept some degraded search performance during reindexing, and how important it is for the reindex to finish quickly and resume indexing.
Mark the most recent reindex job as failed and resume the indexing
Sometimes, you might want to abandon the unfinished reindex job and resume the indexing. You can achieve this via the following steps:
-
Mark the most recent reindex job as failed:
# Omnibus installations sudo gitlab-rake gitlab:elastic:mark_reindex_failed # Installations from source bundle exec rake gitlab:elastic:mark_reindex_failed RAILS_ENV=production -
Uncheck the "Pause Elasticsearch indexing" checkbox in Admin Area > Settings > Advanced Search.
Advanced Search migrations
Introduced in GitLab 13.6.
With reindex migrations running in the background, there's no need for a manual intervention. This usually happens in situations where new features are added to Advanced Search, which means adding or changing the way content is indexed.
To confirm that the Advanced Search migrations ran, you can check with:
curl "$CLUSTER_URL/gitlab-production-migrations/_search?q=*" | jq .This should return something similar to:
{
  "took": 14,
  "timed_out": false,
  "_shards": {
    "total": 1,
    "successful": 1,
    "skipped": 0,
    "failed": 0
  },
  "hits": {
    "total": {
      "value": 1,
      "relation": "eq"
    },
    "max_score": 1,
    "hits": [
      {
        "_index": "gitlab-production-migrations",
        "_type": "_doc",
        "_id": "20201105181100",
        "_score": 1,
        "_source": {
          "completed": true
        }
      }
    ]
  }
}
In order to debug issues with the migrations you can check the elasticsearch.log file.
Retry a halted migration
Some migrations are built with a retry limit. If the migration cannot finish within the retry limit,
it will be halted and a notification will be displayed in the Advanced Search integration settings.
It is recommended to check the elasticsearch.log file to
debug why the migration was halted and make any changes before retrying the migration. Once you believe you've
fixed the cause of the failure, click "Retry migration", and the migration will be scheduled to be retried
in the background.
If you cannot get the migration to succeed, you may consider the last resort to recreate the index from scratch. This may allow you to skip over the problem because a newly created index will skip all migrations as the index will be recreated with the correct up-to-date schema.
All migrations must be finished before doing a major upgrade
Before doing a major version GitLab upgrade, you should have completed all migrations that exist up until the latest minor version before that major version. If you have halted migrations, these will need to be resolved and retried before proceeding with a major version upgrade. Read more about upgrading to a new major version.
GitLab Advanced Search Rake tasks
Rake tasks are available to:
- Build and install the indexer.
- Delete indexes when disabling Elasticsearch.
- Add GitLab data to an index.
The following are some available Rake tasks:
| Task | Description |
|---|---|
sudo gitlab-rake gitlab:elastic:index |
Enables Elasticsearch indexing and run gitlab:elastic:create_empty_index, gitlab:elastic:clear_index_status, gitlab:elastic:index_projects, and gitlab:elastic:index_snippets. |
sudo gitlab-rake gitlab:elastic:index_projects |
Iterates over all projects and queues Sidekiq jobs to index them in the background. |
sudo gitlab-rake gitlab:elastic:index_projects_status |
Determines the overall status of the indexing. It is done by counting the total number of indexed projects, dividing by a count of the total number of projects, then multiplying by 100. |
sudo gitlab-rake gitlab:elastic:clear_index_status |
Deletes all instances of IndexStatus for all projects. Note that this command will result in a complete wipe of the index, and it should be used with caution. |
sudo gitlab-rake gitlab:elastic:create_empty_index |
Generates empty indexes (the default index and a separate issues index) and assigns an alias for each on the Elasticsearch side only if it doesn't already exist. |
sudo gitlab-rake gitlab:elastic:delete_index |
Removes the GitLab indexes and aliases (if they exist) on the Elasticsearch instance. |
sudo gitlab-rake gitlab:elastic:recreate_index |
Wrapper task for gitlab:elastic:delete_index and gitlab:elastic:create_empty_index. |
sudo gitlab-rake gitlab:elastic:index_snippets |
Performs an Elasticsearch import that indexes the snippets data. |
sudo gitlab-rake gitlab:elastic:projects_not_indexed |
Displays which projects are not indexed. |
sudo gitlab-rake gitlab:elastic:reindex_cluster |
Schedules a zero-downtime cluster reindexing task. This feature should be used with an index that was created after GitLab 13.0. |
sudo gitlab-rake gitlab:elastic:mark_reindex_failed |
Mark the most recent re-index job as failed. |
sudo gitlab-rake gitlab:elastic:list_pending_migrations |
List pending migrations. Pending migrations include those that have not yet started, have started but not finished, and those that are halted. |
sudo gitlab-rake gitlab:elastic:estimate_cluster_size |
Get an estimate of cluster size based on the total repository size. |
Environment variables
In addition to the Rake tasks, there are some environment variables that can be used to modify the process:
| Environment Variable | Data Type | What it does |
|---|---|---|
UPDATE_INDEX |
Boolean | Tells the indexer to overwrite any existing index data (true/false). |
ID_TO |
Integer | Tells the indexer to only index projects less than or equal to the value. |
ID_FROM |
Integer | Tells the indexer to only index projects greater than or equal to the value. |
Indexing a specific project
Because the ID_TO and ID_FROM environment variables use the or equal to comparison, you can index only one project by using both these variables with the same project ID number:
root@git:~# sudo gitlab-rake gitlab:elastic:index_projects ID_TO=5 ID_FROM=5
Indexing project repositories...I, [2019-03-04T21:27:03.083410 #3384]  INFO -- : Indexing GitLab User / test (ID=33)...
I, [2019-03-04T21:27:05.215266 #3384]  INFO -- : Indexing GitLab User / test (ID=33) is done!
Advanced Search index scopes
When performing a search, the GitLab index will use the following scopes:
| Scope Name | What it searches |
|---|---|
commits |
Commit data |
projects |
Project data (default) |
blobs |
Code |
issues |
Issue data |
merge_requests |
Merge Request data |
milestones |
Milestone data |
notes |
Note data |
snippets |
Snippet data |
wiki_blobs |
Wiki contents |
Tuning
Guidance on choosing optimal cluster configuration
For basic guidance on choosing a cluster configuration you may refer to Elastic Cloud Calculator. You can find more information below.
- Generally, you will want to use at least a 2-node cluster configuration with one replica, which will allow you to have resilience. If your storage usage is growing quickly, you may want to plan horizontal scaling (adding more nodes) beforehand.
- It's not recommended to use HDD storage with the search cluster, because it will take a hit on performance. It's better to use SSD storage (NVMe or SATA SSD drives for example).
- You can use the GitLab Performance Tool to benchmark search performance with different search cluster sizes and configurations.
-
Heap sizeshould be set to no more than 50% of your physical RAM. Additionally, it shouldn't be set to more than the threshold for zero-based compressed oops. The exact threshold varies, but 26 GB is safe on most systems, but can also be as large as 30 GB on some systems. See Heap size settings and Setting JVM options for more details. - Number of CPUs (CPU cores) per node usually corresponds to the
Number of Elasticsearch shardssetting described below. - A good guideline is to ensure you keep the number of shards per node below 20 per GB heap it has configured. A node with a 30GB heap should therefore have a maximum of 600 shards, but the further below this limit you can keep it the better. This will generally help the cluster stay in good health.
- Number of Elasticsearch shards:
- Small shards result in small segments, which increases overhead. Aim to keep the average shard size between at least a few GB and a few tens of GB.
- Another consideration is the number of documents. To determine the number of shards to use, sum the numbers in the Admin Area > Dashboard > Statistics pane (the number of documents to be indexed), divide by 5 million, and add 5. For example:
- If you have fewer than about 2,000,000 documents, use the default of 5 shards
- 10,000,000 documents:
10000000/5000000 + 5= 7 shards - 100,000,000 documents:
100000000/5000000 + 5= 25 shards
-
refresh_intervalis a per index setting. You may want to adjust that from default1sto a bigger value if you don't need data in real-time. This will change how soon you will see fresh results. If that's important for you, you should leave it as close as possible to the default value. - You might want to raise
indices.memory.index_buffer_sizeto 30% or 40% if you have a lot of heavy indexing operations.
Advanced Search integration settings guidance
- The
Number of Elasticsearch shardssetting usually corresponds with the number of CPUs available in your cluster. For example, if you have a 3-node cluster with 4 cores each, this means you will benefit from having at least 3*4=12 shards in the cluster. Please note, it's only possible to change the shards number by using Split index API or by reindexing to a different index with a changed number of shards. - The
Number of Elasticsearch replicassetting should most of the time be equal to1(each shard will have 1 replica). Using0is not recommended, because losing one node will corrupt the index.
Indexing large instances
This section may be helpful in the event that the other basic instructions cause problems due to large volumes of data being indexed.
WARNING: Indexing a large instance will generate a lot of Sidekiq jobs. Make sure to prepare for this task by having a Scalable and Highly Available Setup or creating extra Sidekiq processes.
-
Create empty indexes:
# Omnibus installations sudo gitlab-rake gitlab:elastic:create_empty_index # Installations from source bundle exec rake gitlab:elastic:create_empty_index RAILS_ENV=production -
If this is a re-index of your GitLab instance, clear the index status:
# Omnibus installations sudo gitlab-rake gitlab:elastic:clear_index_status # Installations from source bundle exec rake gitlab:elastic:clear_index_status RAILS_ENV=production -
Indexing large Git repositories can take a while. To speed up the process, you can tune for indexing speed:
-
You can temporarily disable
refresh, the operation responsible for making changes to an index available to search. -
You can set the number of replicas to 0. This setting controls the number of copies each primary shard of an index will have. Thus, having 0 replicas effectively disables the replication of shards across nodes, which should increase the indexing performance. This is an important trade-off in terms of reliability and query performance. It is important to remember to set the replicas to a considered value after the initial indexing is complete.
In our experience, you can expect a 20% decrease in indexing time. After completing indexing in a later step, you can return
refreshandnumber_of_replicasto their desired settings.NOTE: This step is optional but may help significantly speed up large indexing operations.
curl --request PUT localhost:9200/gitlab-production/_settings --header 'Content-Type: application/json' \ --data '{ "index" : { "refresh_interval" : "-1", "number_of_replicas" : 0 } }' -
-
Index projects and their associated data:
# Omnibus installations
sudo gitlab-rake gitlab:elastic:index_projects

# Installations from source
bundle exec rake gitlab:elastic:index_projects RAILS_ENV=production
This enqueues a Sidekiq job for each project that needs to be indexed. You can view the jobs in Admin Area > Monitoring > Background Jobs > Queues Tab and click
elastic_commit_indexer, or you can query indexing status using a Rake task:# Omnibus installations sudo gitlab-rake gitlab:elastic:index_projects_status # Installations from source bundle exec rake gitlab:elastic:index_projects_status RAILS_ENV=production Indexing is 65.55% complete (6555/10000 projects)If you want to limit the index to a range of projects you can provide the
ID_FROMandID_TOparameters:# Omnibus installations sudo gitlab-rake gitlab:elastic:index_projects ID_FROM=1001 ID_TO=2000 # Installations from source bundle exec rake gitlab:elastic:index_projects ID_FROM=1001 ID_TO=2000 RAILS_ENV=productionWhere
ID_FROMandID_TOare project IDs. Both parameters are optional. The above example will index all projects from ID1001up to (and including) ID2000.NOTE: Sometimes the project indexing jobs queued by
gitlab:elastic:index_projectscan get interrupted. This may happen for many reasons, but it's always safe to run the indexing task again. It will skip repositories that have already been indexed.As the indexer stores the last commit SHA of every indexed repository in the database, you can run the indexer with the special parameter
UPDATE_INDEXand it will check every project repository again to make sure that every commit in a repository is indexed, which can be useful in case if your index is outdated:# Omnibus installations sudo gitlab-rake gitlab:elastic:index_projects UPDATE_INDEX=true ID_TO=1000 # Installations from source bundle exec rake gitlab:elastic:index_projects UPDATE_INDEX=true ID_TO=1000 RAILS_ENV=productionYou can also use the
gitlab:elastic:clear_index_statusRake task to force the indexer to "forget" all progress, so it will retry the indexing process from the start. -
Personal snippets are not associated with a project and need to be indexed separately:
# Omnibus installations sudo gitlab-rake gitlab:elastic:index_snippets # Installations from source bundle exec rake gitlab:elastic:index_snippets RAILS_ENV=production -
Enable replication and refreshing again after indexing (only if you previously disabled it):
curl --request PUT localhost:9200/gitlab-production/_settings --header 'Content-Type: application/json' \
     --data '{
       "index" : {
           "number_of_replicas" : 1,
           "refresh_interval" : "1s"
       } }'
A force merge should be called after enabling the refreshing above.
For Elasticsearch 6.x, the index should be in read-only mode before proceeding with the force merge:
curl --request PUT localhost:9200/gitlab-production/_settings --header 'Content-Type: application/json' \
     --data '{
       "settings": {
         "index.blocks.write": true
       } }'
Then, initiate the force merge:
curl --request POST 'localhost:9200/gitlab-production/_forcemerge?max_num_segments=5'After this, if your index is in read-only mode, switch back to read-write:
curl --request PUT localhost:9200/gitlab-production/_settings --header 'Content-Type: application/json' \ --data '{ "settings": { "index.blocks.write": false } }' -
After the indexing has completed, enable Search with Elasticsearch enabled.
Deleted documents
Whenever a change or deletion is made to an indexed GitLab object (a merge request description is changed, a file is deleted from the master branch in a repository, a project is deleted, etc), a document in the index is deleted. However, since these are "soft" deletes, the overall number of "deleted documents", and therefore wasted space, increases. Elasticsearch does intelligent merging of segments in order to remove these deleted documents. However, depending on the amount and type of activity in your GitLab installation, it's possible to see as much as 50% wasted space in the index.
In general, we recommend letting Elasticsearch merge and reclaim space automatically, with the default settings. From Lucene's Handling of Deleted Documents, "Overall, besides perhaps decreasing the maximum segment size, it is best to leave Lucene's defaults as-is and not fret too much about when deletes are reclaimed."
However, some larger installations may wish to tune the merge policy settings:
-
Consider reducing the
index.merge.policy.max_merged_segmentsize from the default 5 GB to maybe 2 GB or 3 GB. Merging only happens when a segment has at least 50% deletions. Smaller segment sizes will allow merging to happen more frequently.curl --request PUT localhost:9200/gitlab-production/_settings ---header 'Content-Type: application/json' \ --data '{ "index" : { "merge.policy.max_merged_segment": "2gb" } }' -
You can also adjust
index.merge.policy.reclaim_deletes_weight, which controls how aggressively deletions are targeted. But this can lead to costly merge decisions, so we recommend not changing this unless you understand the tradeoffs.curl --request PUT localhost:9200/gitlab-production/_settings ---header 'Content-Type: application/json' \ --data '{ "index" : { "merge.policy.reclaim_deletes_weight": "3.0" } }' -
Do not do a force merge to remove deleted documents. A warning in the documentation states that this can lead to very large segments that may never get reclaimed, and can also cause significant performance or availability issues.
Reverting to Basic Search
Sometimes there may be issues with your Elasticsearch index data and as such GitLab will allow you to revert to "basic search" when there are no search results and assuming that basic search is supported in that scope. This "basic search" will behave as though you don't have Advanced Search enabled at all for your instance and search using other data sources (such as PostgreSQL data and Git data).
Data recovery: Elasticsearch is a secondary data store only
The use of Elasticsearch in GitLab is only ever as a secondary data store. This means that all of the data stored in Elasticsearch can always be derived again from other data sources, specifically PostgreSQL and Gitaly. Therefore, if the Elasticsearch data store is ever corrupted for whatever reason, you can reindex everything from scratch.
Troubleshooting
One of the most valuable tools for identifying issues with the Elasticsearch integration will be logs. The most relevant logs for this integration are:
-
sidekiq.log- All of the indexing happens in Sidekiq, so much of the relevant logs for the Elasticsearch integration can be found in this file. -
elasticsearch.log- There are additional logs specific to Elasticsearch that are sent to this file that may contain useful diagnostic information about searching, indexing or migrations.
Here are some common pitfalls and how to overcome them.
How can I verify that my GitLab instance is using Elasticsearch?
There are a couple of ways to achieve that:
-
Whenever you perform a search there will be a link on the search results page in the top right hand corner saying "Advanced search functionality is enabled". This is always correctly identifying whether the current project/namespace being searched is using Elasticsearch.
-
From the admin area under Settings > Advanced Search check that the Advanced Search settings are checked.
Those same settings there can be obtained from the Rails console if necessary:
::Gitlab::CurrentSettings.elasticsearch_search? # Whether or not searches will use Elasticsearch ::Gitlab::CurrentSettings.elasticsearch_indexing? # Whether or not content will be indexed in Elasticsearch ::Gitlab::CurrentSettings.elasticsearch_limit_indexing? # Whether or not Elasticsearch is limited only to certain projects/namespaces -
If Elasticsearch is limited to specific namespaces and you need to know if Elasticsearch is being used for a specific project or namespace, you can use the Rails console:
::Gitlab::CurrentSettings.search_using_elasticsearch?(scope: Namespace.find_by_full_path("/my-namespace"))
::Gitlab::CurrentSettings.search_using_elasticsearch?(scope: Project.find_by_full_path("/my-namespace/my-project"))
I updated GitLab and now I can't find anything
We continuously make updates to our indexing strategies and aim to support newer versions of Elasticsearch. When indexing changes are made, it may be necessary for you to reindex after updating GitLab.
I indexed all the repositories but I can't get any hits for my search term in the UI
Make sure you indexed all the database data as stated above.
If there aren't any results (hits) in the UI search, check if you are seeing the same results via the rails console (sudo gitlab-rails console):
u = User.find_by_username('your-username')
s = SearchService.new(u, {:search => 'search_term', :scope => 'blobs'})
pp s.search_objects.to_a
Beyond that, check via the Elasticsearch Search API to see if the data shows up on the Elasticsearch side:
curl --request GET <elasticsearch_server_ip>:9200/gitlab-production/_search?q=<search_term>More complex Elasticsearch API calls are also possible.
It is important to understand at which level the problem is manifesting (UI, Rails code, Elasticsearch side) to be able to troubleshoot further.
NOTE: The above instructions are not to be used for scenarios that only index a subset of namespaces.
See Elasticsearch Index Scopes for more information on searching for specific types of data.
I indexed all the repositories but then switched Elasticsearch servers and now I can't find anything
You will need to re-run all the Rake tasks to reindex the database, repositories, and wikis.
The indexing process is taking a very long time
The more data present in your GitLab instance, the longer the indexing process takes.
There are some projects that weren't indexed, but I don't know which ones
You can run sudo gitlab-rake gitlab:elastic:projects_not_indexed to display projects that aren't indexed.
No new data is added to the Elasticsearch index when I push code
NOTE: This was fixed in GitLab 13.2 and the Rake task is not available for versions greater than that.
When performing the initial indexing of blobs, we lock all projects until the project finishes indexing. It could happen that an error during the process causes one or multiple projects to remain locked. In order to unlock them, run:
sudo gitlab-rake gitlab:elastic:clear_locked_projects
Can't specify parent if no parent field has been configured error
If you enabled Elasticsearch before GitLab 8.12 and have not rebuilt indexes you will get exception in lots of different cases:
Elasticsearch::Transport::Transport::Errors::BadRequest([400] {
    "error": {
        "root_cause": [{
            "type": "illegal_argument_exception",
            "reason": "Can't specify parent if no parent field has been configured"
        }],
        "type": "illegal_argument_exception",
        "reason": "Can't specify parent if no parent field has been configured"
    },
    "status": 400
}):
This is because we changed the index mapping in GitLab 8.12 and the old indexes should be removed and built from scratch again, see details in the update guide.
-
Exception
Elasticsearch::Transport::Transport::Errors::BadRequestIf you have this exception (just like in the case above but the actual message is different) please check if you have the correct Elasticsearch version and you met the other requirements. There is also an easy way to check it automatically with
sudo gitlab-rake gitlab:checkcommand. -
Exception
Elasticsearch::Transport::Transport::Errors::RequestEntityTooLarge[413] {"Message":"Request size exceeded 10485760 bytes"}This exception is seen when your Elasticsearch cluster is configured to reject requests above a certain size (10MiB in this case). This corresponds to the
http.max_content_lengthsetting inelasticsearch.yml. Increase it to a larger size and restart your Elasticsearch cluster.AWS has fixed limits for this setting ("Maximum Size of HTTP Request Payloads"), based on the size of the underlying instance.
My single node Elasticsearch cluster status never goes from yellow to green even though everything seems to be running properly
For a single node Elasticsearch cluster the functional cluster health status will be yellow (never green) because the primary shard is allocated but replicas cannot be as there is no other node to which Elasticsearch can assign a replica. This also applies if you are using the Amazon Elasticsearch service.
WARNING:
Setting the number of replicas to 0 is discouraged (this is not allowed in the GitLab Elasticsearch Integration menu). If you are planning to add more Elasticsearch nodes (for a total of more than 1 Elasticsearch) the number of replicas will need to be set to an integer value larger than 0. Failure to do so will result in lack of redundancy (losing one node will corrupt the index).
If you have a hard requirement to have a green status for your single node Elasticsearch cluster, please make sure you understand the risks outlined in the previous paragraph and then run the following query to set the number of replicas to 0(the cluster will no longer try to create any shard replicas):
curl --request PUT localhost:9200/gitlab-production/_settings --header 'Content-Type: application/json' \
     --data '{
       "index" : {
         "number_of_replicas" : 0
       }
     }'
health check timeout: no Elasticsearch node available error in Sidekiq
If you're getting a health check timeout: no Elasticsearch node available error in Sidekiq during the indexing process:
Gitlab::Elastic::Indexer::Error: time="2020-01-23T09:13:00Z" level=fatal msg="health check timeout: no Elasticsearch node available"You probably have not used either http:// or https:// as part of your value in the "URL" field of the Elasticsearch Integration Menu. Please make sure you are using either http:// or https:// in this field as the Elasticsearch client for Go that we are using needs the prefix for the URL to be accepted as valid.
Once you have corrected the formatting of the URL, delete the index (via the dedicated Rake task) and reindex the content of your instance.
My Elasticsearch cluster has a plugin and the integration is not working
Certain 3rd party plugins may introduce bugs in your cluster or for whatever reason may be incompatible with our integration. You should try disabling plugins so you can rule out the possibility that the plugin is causing the problem.
Low-level troubleshooting
There is a more structured, lower-level troubleshooting document for when you experience other issues, including poor performance.
Elasticsearch code_analyzer doesn't account for all code cases
The code_analyzer pattern and filter configuration is being evaluated for improvement. We have fixed most edge cases that were not returning expected search results due to our pattern and filter configuration.
Improvements to the code_analyzer pattern and filters are being discussed in epic 3621.
Some binary files may not be searchable by name
In GitLab 13.9, a change was made where binary file names are being indexed. However, without indexing all projects' data from scratch, only binary files that are added or updated after the GitLab 13.9 release are searchable.
Last resort to recreate an index
There may be cases where somehow data never got indexed and it's not in the queue, or the index is somehow in a state where migrations just cannot proceed. It is always best to try to troubleshoot the root cause of the problem using the above troubleshooting steps.
If there are no other options, then you always have the option of recreating the entire index from scratch. If you have a small GitLab installation, this can sometimes be a quick way to resolve a problem, but if you have a large GitLab installation, then this will likely take a very long time to complete. Until the index is fully recreated, your index will not be serving correct search results, so you may want to disable Search with Elasticsearch while it is running.
If you are sure you've read the above caveats and want to proceed, then you should run the following Rake task to recreate the entire index from scratch:
For Omnibus installations
# WARNING: DO NOT RUN THIS UNTIL YOU READ THE DESCRIPTION ABOVE
sudo gitlab-rake gitlab:elastic:index
For installations from source
# WARNING: DO NOT RUN THIS UNTIL YOU READ THE DESCRIPTION ABOVE
cd /home/git/gitlab
sudo -u git -H bundle exec rake gitlab:elastic:index
How does Advanced Search handle private projects?
Advanced Search will store all the projects in the same Elasticsearch indexes, however searches will only surface results that can be viewed by the user. Advanced Search will honor all permission checks in the application by filtering out projects that a user does not have access to at search time.
Access requirements for the self-managed AWS Elasticsearch Service
To use the self-managed AWS Elasticsearch Service with GitLab, configure your instance's domain access policies to contain the actions below. See Identity and Access Management in Amazon Elasticsearch Service for details.
es:ESHttpDelete
es:ESHttpGet
es:ESHttpHead
es:ESHttpPost
es:ESHttpPut
es:ESHttpPatch